Abstract Flags Cutting, Rolling, Placing on Cake

Supplies and Tools
To Color pre-colored modeling chocolate
1. I used Blue and Red coloring gel
2. Modeling Chocolate about 1/2 pound or 32 g ea. color
3. Parchment paper or rubber gloves.
4. Two tooth picks
5. 16 mini or a dozen cupcakes
Rolling Cutting out the Toppers
1. A Cutting board (I use a sewing cutting board but the flexible cutting boards at bargain store work well too)
2. A Rolling pin ( the smaller rolling pins are easier to work with as well as clay tool sets)
3. A Hand Sifter..is easy to add more cornstarch should you need more.
4. Cornstarch
5. Spatulas..small offset and tiny spatula
6. Dusting brush, like a blush make up brush
7. Cutters 2-2 1/2 inches for medium cupcakes or shaped cupcakes.
Note 1. When covering cupcakes with modeling chocolate gauge the size of the cake by measuring out a extra amount of the clay to go all the way around, without touching your cakes.
 |
| 2 1/2 inch for the medium and 2 in. for the mini cupcakes |
Since we are covering cupcakes which are have less measuring than larger cakes, just drop a cutter over your cake and if it easily go around the cake without touching it about an 1/8 of extra space all the way round your set.
This compensates for the mound of frosting you'll put on the cake, which helps to form the clay around smoothly.
Two ways to Color Modeling Chocolate
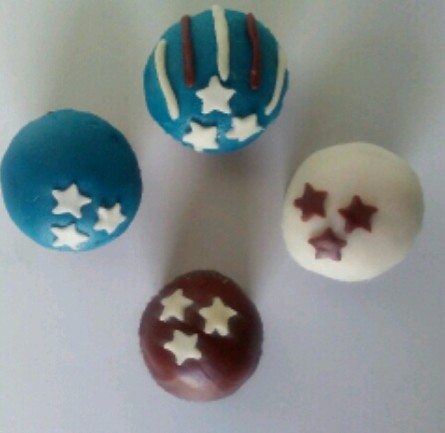
- In my video I show how I colored modeling chocolate a deeper blue for Independence Day. Starting with a light blue or turquoise the dark blue color meld to make a more royal blue for our flag. Then I started with a chocolate to get a deep red, because red is one of the most powerful color gels and those little buggies taste, terrible. So I used the same principle behind red velvet cake, by starting with chocolate. Even though the coloring step takes a bit of time to get just right, it's very satisfy. I used this process because the clay had color already.
2. If you want to color a whole bag of candy melts it's easier to add a few squeezes of color gel to cooled down corn syrup before you add it to the melted candy. If you want more color, after it's set and kneaded you can add a bit it like i do in my video.
Stay Sweet ;)
Comments
Post a Comment